|
MaxDif |

|

|

|
||
|
MaxDif |
|
|

|

|
MaxDif
|
MaxDif |
|
|
|
||
|
MaxDif |
|
|
|
|
Example of MaxDif
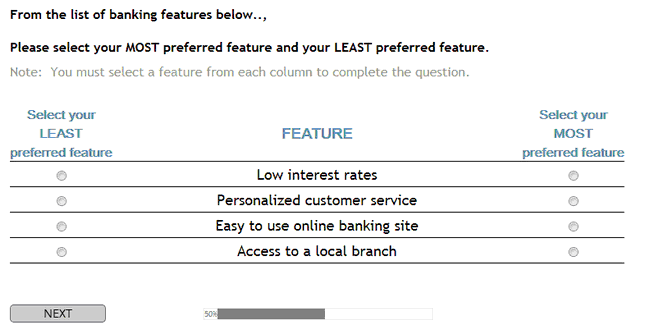
In the above example the respondent is asked to select from a list of features about banks the feature that they would least prefer and the feature that they most prefer when selecting a bank to bank with.
The respondent must select one item on each side of the grid and they are prevented fro selecting the same item on either side by the system.
To set up the question type you need to input the items (above called FEATURE) and the text headings for the left and right columns. The features can be piped in from another question if required and full formatting control is provided for the column headings by using the rich text editor.
Question Elements:
Entering the Question parameters for a MaxDif:
Below is an image of the parameters that control the creation of the MaxDif question type.
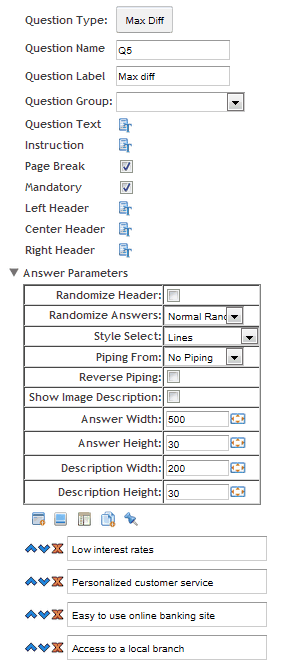
Set the question name and label to what ever is appropriate. In the above example we have accepted the default question name 'Q5' and labbeled the question Max Dif.
Question Text Enter the question text by clicking on the Question Text icon. A rich text editor box appears where you type your question. You have full rich text control over the question formatting.
Note the question text appears in the central panel (Question Display) when you close the rich text editor box by clicking the  in the top left corner.
Instruction Text: Enter the instruction text by clicking on the Instruction text icon. A rich text editor box appears where you type your instructions. You have full rich text control over the question formatting.
Note the Instruction text appears in the central panel (Question Display) when you close the rich editor box by clicking the in the top left corner.
NOTE: Instruction text is optional. You can also include instructions as a part of the Question Text.
 : Causes the following question to appear on a new screen (default) Un-click this box to turn off Page Break and cause the questions to appear on the same screen or page, under each other.
 : If this box is checked then the question must be answered by the respondent to continue with the survey. Note that the default setting is ‘True’.
Left Header: Enter the column heading for the left most column of radio buttons. Above we have labeled the column 'Select your LEAST preferred feature' and formatted it to be the color Teal and size 'small'.
Center Header: Enter the column heading for the central of of items or possible answers. Above we have labeled the column 'FEATURES' and formatted it to be the color Teal and size 'small'.
Right Header: Enter the column heading for the right most column of radio buttons. Above we have labeled the column 'Select your MOST preferred feature' and formatted it to be the color Teal and size 'small'.
Adding the items to the centre column.
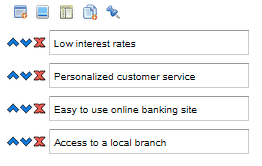
There are four ways of entering the items to your Max Dif question.
 The first icon allows you to enter an un-formatted text column heading. You can cut and paste the text into these column heading boxes from MS Word without worrying about the Word formatting coming across. The default theme formatting will be applied which is suitable in most cases. This is the method used in th eabove example.
 The second option opens the image library. If you wish your items to be images, select the images you wish to use in the grid by clicking on and selecting the appropriate images from the image library. Note that you can upload new images to your library from this option also.
 The third option allows you to create a rich text item. Clicking on this icon creates a placeholder - you then click on this placeholder to open the rich text editor and type in and format your column heading.
 Clicking this icon will open a pop up text box that will enable you to cut and paste all your column headings from another document in one go. Each column heading must be on a separate line. Any document formatting from the original document will be deleted.
Note the mix of types used to achieve the desired formatting. For greater detail on the three types of answers you can create see Creating a question - General Concepts.
 Fix position: Click on this option to select the items that you wish to lock in position when using the randomize option.
Answer Parameters
Click on the arrow next to 'Answer Parameters' to reveal the following answer parameters, which can be set to control the question wide settings of your MaxDif question.
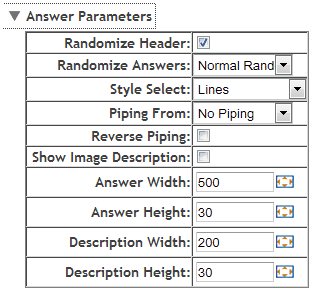
Randomize Header: Check this box to randomize the order of the right and left columns of the MaxDif grid. In the above example 50% of your respondents will see the table with the LEAST option of the left and the MOST option on the right and 50% of respondents will see the columns the other way round. This helps to control for any order bias that may be present..
Randomize Answers: This option will present the centre column of items in a random fashion to each respondent.
Style Select: There are currently three different styles for displaying your MaxDif question.
Boxed - which displays the grid with all the lines drawn -
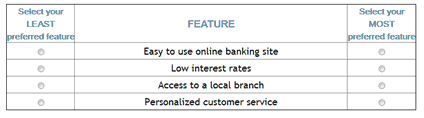
Lines -
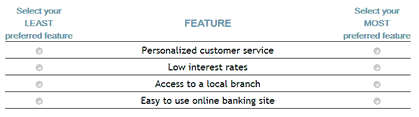
No Lines -
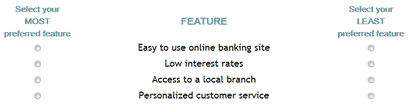
Piping from: Used to populate the answer items with the answers selected by a respondent at an earlier question.
Reverse piping: populates the answer fields with all the answers from a previous question that were NOT selected.
To use simply select from the drop-down the previous question that contains the answers you wish piped.
NOTE: To construct a more sophisticated piping regime based on several previous questions use a Pipe question type.
Show Image Description: Will cause the description of an image to be displayed when image answer types are used. Note that the image description needs to have been created for the image in the image library.
Answer Width:
Answer Height:
Description Width:
Description Height:
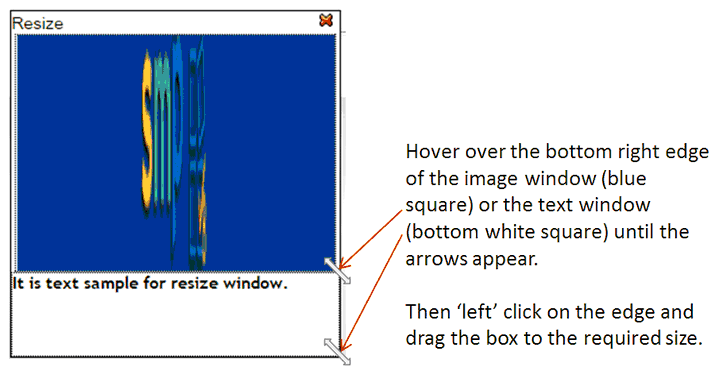
These options all allow the user to define the height and width of the answer values whether they are images or text. This can be achieved by either typing the exact number of pixels desired for the option being edited or by clicking on the box image which causes the folling pop up to appear. Oce this pop up appears the size of the answer and/or description of an image can be set by dragging the pop u boxes to the desired widths.