|
Creating a question - General Concepts |

|

|

|
||
|
Creating a question - General Concepts |

|

|

|

|
Creating a question - General Concepts
There are a number of general question creation concepts that will help you create surveys efficiently.
Question Elements:
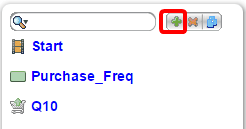
Add a question by pressing on the green plus button at the top of the left hand pane of the survey editor.
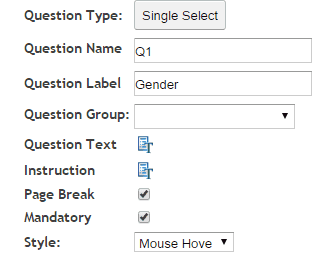
Then in the right hand pane add the basic question details.
![]()
![]() : Enter the question text by clicking on the Question Text icon. A rich text editor box appears where you type your question. You have full rich text control over the question formatting.
: Enter the question text by clicking on the Question Text icon. A rich text editor box appears where you type your question. You have full rich text control over the question formatting.
Note the question text appears in the central panel (Question Display) when you close the rich text editor box by clicking the ![]() in the top left corner.
in the top left corner.
![]() : Enter the instruction text by clicking on the Instruction text icon. A rich text editor box appears where you type your instructions. You have full rich text control over the question formatting.
: Enter the instruction text by clicking on the Instruction text icon. A rich text editor box appears where you type your instructions. You have full rich text control over the question formatting.
Note the Instruction text appears in the central panel (Question Display) when you close the rich editor box by clicking the ![]() in the top left corner.
in the top left corner.
NOTE: Instruction text is optional. You can also include instructions as a part of the Question Text.
![]() : Causes the following question to appear on a new screen (default) Un-click this box to turn off Page Break and cause the questions to appear on the same screen or page, one under each other.
: Causes the following question to appear on a new screen (default) Un-click this box to turn off Page Break and cause the questions to appear on the same screen or page, one under each other.
![]() : If this box is checked then the question must be answered by the respondent to continue with the survey. Note the default setting is ‘True’.
: If this box is checked then the question must be answered by the respondent to continue with the survey. Note the default setting is ‘True’.
Creating answers - Four ways to input question answers (the code frame)
SMP allows the user to enter the answers for a particular question using four different methods. Note also that these methods can be mixed so it is possible to combine any type of answers.
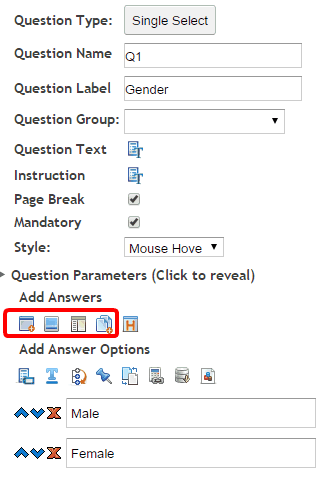
the four types of methods to crate answers you can use are:
| 1. | text answer, |
| 2. | image answer, |
| 3. | rich text answer, and, |
| 4. | multi answer upload - code frame upload. |
To use any of these answer options click on the relevant option. The four options are shown below highlighted by the red box. They are in the order as listed above.
Lets look at each individually.
1. Adding Text Answers

To enter a text answer select the text answer option ![]() in the right hand panel of the question editor.
in the right hand panel of the question editor.
Clicking on this icon will crate another text box to appear as in the example below.
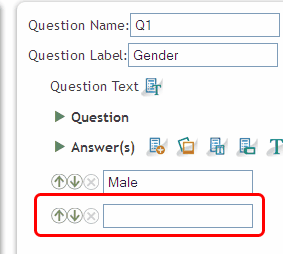
Enter the text required to create the answer. In this case you would type "Female."
2. Adding Image Answers
![]()
Clicking on the ![]() icon opens the image editor function for you. You then use the image editor to select the images you wish to include as answers. For a full explanation of the image editor click here.
icon opens the image editor function for you. You then use the image editor to select the images you wish to include as answers. For a full explanation of the image editor click here.
3. Adding Rich Text Answers

The Rich Text Answer allows you complete control over the type and formatting of your answer. Using this option allows you to create an answer that mixes text and images and you can format the text to be anything at all. Clicking on the icon ![]() adds an a shaded answer box as in the example below.
adds an a shaded answer box as in the example below.

To add the answer click on the ![]() icon at the end of the shaded box to open the rich text editor.
icon at the end of the shaded box to open the rich text editor.
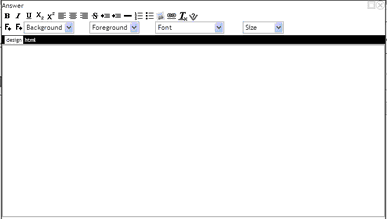
Add images or add and format text at your leisure. You can create as complex an answer as desired.
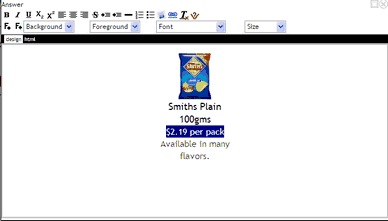
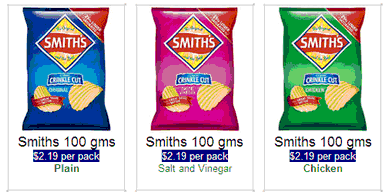
The example above creates the following answers.
4. Adding a whole code frame
Click this icon to open the code frame pop-up and cut and paste your code frame from the questionnaire into this box. Note that using this box it is ok to cut and paste from MS Word. All the Word mark up language that can create problems with HTML will automatically be omitted..
![]()
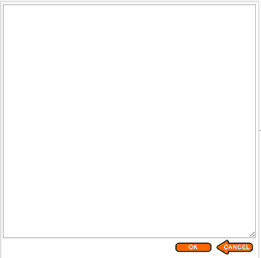
For example. Cutting and pasting the following into the pop up box and pressing the OK button -
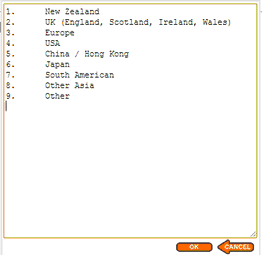
will cause the following answer codes to be input to your survey.
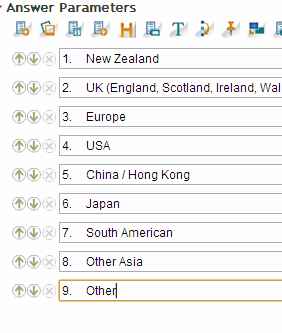
Note that you can also edit the contents of the pop up box before hitting the OK button to change the content. In this example you may wish to delete the numbers first.
Using effective question names.
You add the name for the question you are creating by typing an appropriate name into the 'Question Name: text box.
![]()
Using meaningful names here will help you navigate the questionnaire during setup but also when you download (extract) the data as this name will be used to label the column of data in the data table.
This name will appear in two places:
To name your question on the question cards in the left hand column;

and in your data extract file;
Changing the order of your questions.
To change the order of your questions grab onto one of the question rows in the left hand column and when the arrow symbol appears move it up or down by dragging the question card to the appropriate place.
Note that when changing the order of your questions to take careful note of any logic that has been used such as skips and gates because these will now need to be altered.