|
The Image Library |

|

|

|
||
|
The Image Library |
|
|

|

|
The Image Library
|
The Image Library |
|
|
|
||
|
The Image Library |
|
|
|
|
The Image Library: A tree style file explorer type of library that enables you to easily upload, store, arrange and use the images you wish to use in your surveys. To include images from this library into your survey question you create your question and point to the image or select a group of images from across the library and they all appear as answer options. This set of controls allows you to access the image library directly from the question editor, allowing you to upload the images you require for this question and automatically adding them to the question as potential answers.
NOTE: IF YOU DELETE AN IMAGE FROM THE IMAGE LIBRARY THAT IS BEING USED IN A SURVEY THAT SURVEY WILL NO LONGER CONTAIN THE IMAGE.
Accessing the Image Library.
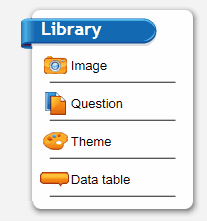
The image library can be accessed from the main menu by the selecting Image Library from the Library section on the main screen.
The library can also be accessed from anywhere in the program that you can see this icon. ![]()
In the rich text editor it is located in the following position.
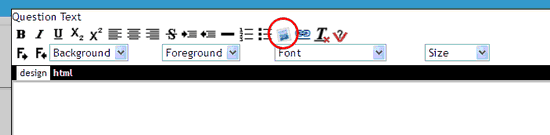
Clicking on the image icon here produces the following screen:
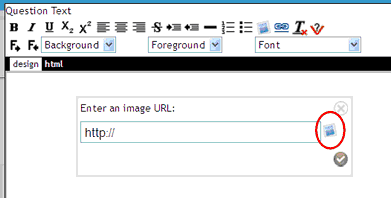
Clicking on the icon this time will open the image library. Alternatively you can point to any image location on the web to have your image appear in this position. Simply enter the URL of the image or cut and paste this address into the box and press the tick icon. To get an image from the library click on the image library icon in this box, select the image from the library, close the library pop up and press the tick icon. the image will then appear in the rich text editor and can be re-sized and formatted as required.
To open the image library and select images for use in image question types click on this icon ![]() when available in the parameters pane of the various question types. See the section on question types for more on this.
when available in the parameters pane of the various question types. See the section on question types for more on this.
Opening the image library in any of the above methods will result in the following popup appearing.
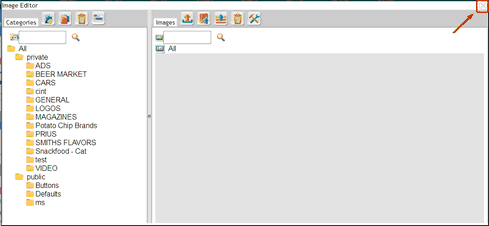
Note that to close the image editor click on the x in the top right hand corner.
You will notice when you open the image editor that there are two directories. the first is the private directory. This is were you create your own directories and store your own images. Only you and other members of your user group can see these images. They are for your own surveys.
The second area is the public area. You cannot edit this area. It contains images available to anyone who uses the system and contains things such as button images for use in your themes and general default images for use in questionnaires such as none or don't know.
The options available to you in the image library include:
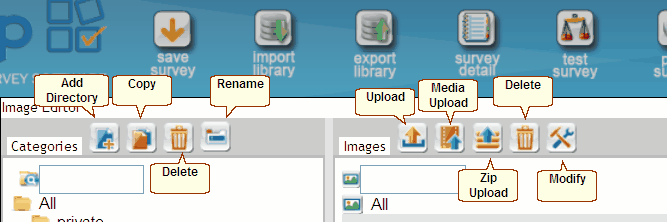
Create a directory
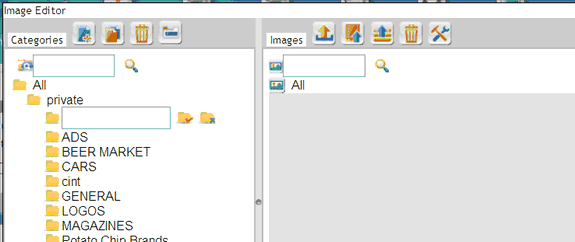
Firstly we need to create some directories to store the new images in.
1. Click on the add directory button. A text box will appear under the private directory, like in the following screen shot. Type in the name of your directory and press the folder tick icon -
![]()
2. Type in the name for the new directory into the box provided and click on the ok button
![]() .
.
Now add some images.
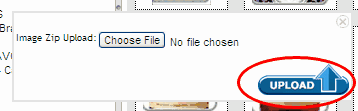
1. Click on this new directory then click on the upload image files in a zip file option ![]() in the upper right list of icons on the image library popup. This assumes that all your images for this question are contained in a zip file. If not you can upload them one at a time.
in the upper right list of icons on the image library popup. This assumes that all your images for this question are contained in a zip file. If not you can upload them one at a time.
2. Click on the "Choose File" option.
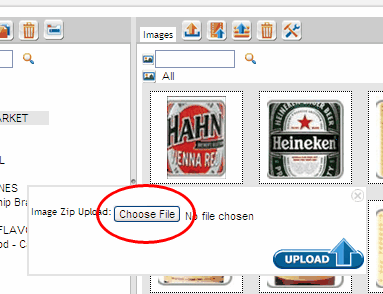
3. Select the zip file that contains the images you wish to upload from your file explorer popup.
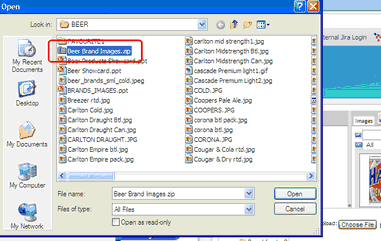
4. Click on upload.
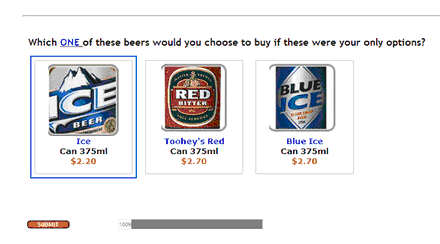
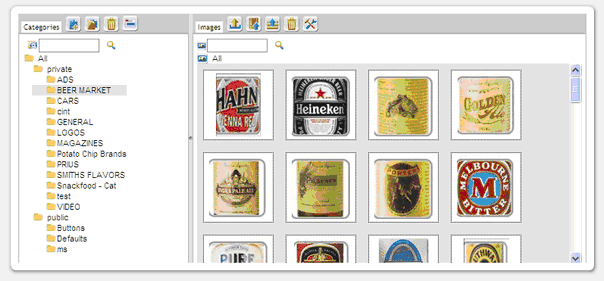
This will result in a new directory containing all the images in your zip file. In this example a directory of beer brands called BEER MARKET was created and all the beer image logos uploaded to it.
Let’s add labels to the images - these image labels can also be used in your survey and can include anything includeding product details such as brand, type, packaging, price - any thing you like - adding labels uses the rich text editor.
So, to add labels to your images:
1. Open the image Library and highlight the directory with the images in it you wish to label.
2. Double click on any of the images. The rich text editor will appear.
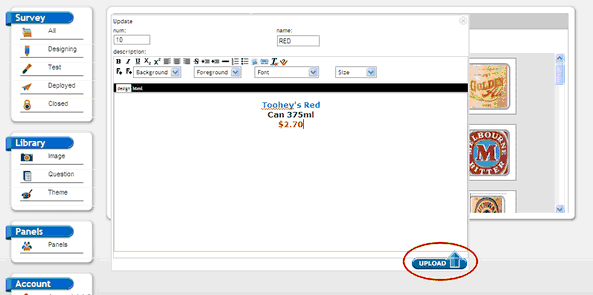
3. Type in and format the label you wish to use - such as in the above example.
4. Continue to add and format as many labels as you wish then hit the "Upload" button.
Now when selected and optioned up correctly your image logo will appear like this in your survey: