|
Dynamic Grid |

|

|

|
||
|
Dynamic Grid |
|
|

|

|
Dynamic Grid
|
Dynamic Grid |
|
|
|
||
|
Dynamic Grid |
|
|
|
|
In the example of a dynamic grid below the respondent selects the answer they desire by clicking on one of the statements in the boxes below the stimuli. After making their selection the next image automatically appears,
This question type can be used to replace many grids, alleviating boredom and improving response rates.
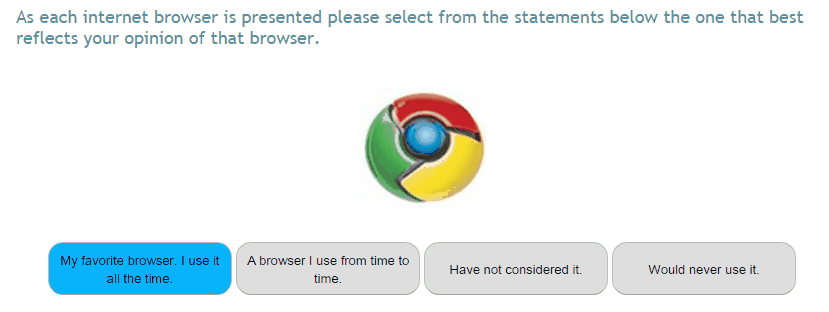
Setting up a dynamic grid question type is much the same as setting up a grid. You need to input and format the stimuli about which the question applies in the 'Row' parameters and the possible answers are set up in the 'Column' parameters.
Question Elements:
 : Enter the question text by clicking on the Question Text icon. A rich text editor box appears where you type your question. You have full rich text control over the question formatting.
Note the question text appears in the central panel (Question Display) when you close the rich text editor box by clicking the  in the top left corner.
 : Enter the instruction text by clicking on the Instruction text icon. A rich text editor box appears where you type your instructions. You have full rich text control over the question formatting.
NOTE: Instruction text is optional. You can also include instructions as a part of the Question Text.

Causes the following question to appear on a new screen (default) Un-click this box to turn off Page Break and cause the questions to appear on the same screen or page, under each other.

If this box is checked then the question must be answered by the respondent to continue with the survey. Note that the default setting is ‘True’.
Column Headings (Answers)
Adding and formatting the COLUMNS for your grid - Column Headings:
To add columns to your grid click on one of the four icons below. Each of these icons represents a different type of column headings that can be added.
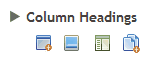
 The first icon allows you to enter an un-formatted text column heading. You can cut and paste the text into these column heading boxes from MS Word without worrying about the Word formatting coming across. The default theme formatting will be applied which is suitable in most cases.
 The second option opens the image library. Select the images you wish to use in the grid by clicking on and selecting the appropriate images. Note that you can upload new images to your library from this option also.
 The third option allows you to create a rich text column heading. Clicking on this icon creates a placeholder - you then click on this placeholder to open the rich text editor and type in and format your column heading.
 Clicking this icon will open a pop up text box that will enable you to cut and paste all your column headings from another document in one go. Each column heading must be on a separate line. Any document formatting from the original document will be deleted.
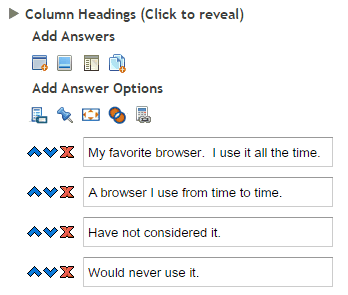
The image below shows the parameters that were used to create the above example. Each time the third option icon was clicked on a place holder like those below was created and the user clicked on the icon at the end of the box opening a rich text editor and typing in the answer.
Column Label Options
 Answer name: Click to input the names you wish to give each question which will also appear in the data extract when you download the data.
 Fix position: Click on this option to select the columns that you wish to lock in position when using the randomize option. For example you may wish to lock an answer such as Not Applicable as the last column.
 Set Size option: Use this option to control the width of each column. You can make some wider than others or leave the default grid wide setting so that all are equal widths.
 Exclusive option: Use this option when using the multi-select select option to cause all other selection to be null - This is most commonly used when one of the column answers is - None of these. Clicking it will wipe the other answers in the row if selected. To set - click on the icon and select the columns you wish this to apply to.
 Answer Value Column: Use this feature to override the default values assigned to each of the answers, Values are assigned to the answers in the oreder in which they are placed in the parameters pane. To change these defaults click on this icon and type in the values that you wish to use for each of the answers.
Column Label Parameters
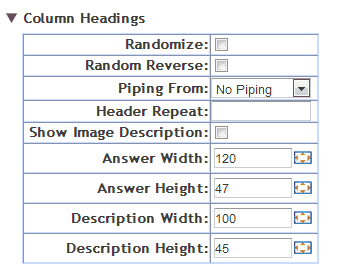
Randomize: Check this box to randomize the order of the columns for each respondent.
Random Reverse: This option reverses the order in which the answers are presented from "first to last" to - "last to first" at random for different respondents.
For example one respondent will be shown the answers to a scale in this order -
Agree
Somewhat agree
Neither agree nor disagree
Somewhat disagree
Disagree,
and another respondent will be shown the same scale but in the reverse order:
Disagree
Somewhat disagree
Neither agree nor disagree
Somewhat agree
Agree
Piping from: Used to populate the answer fields with the answers selected by a respondent at an earlier question.
Reverse piping: populates the answer fields with all the answers from a previous question that were NOT selected.
To use simply select from the drop-down the previous question that contains the answers you wish piped.
NOTE: To construct a more sophisticated piping regime based on several previous questions use a Pipe question type.
Show Image Description: Will cause the description of an image to be displayed when image answer types are used. Note that the image description needs to have been created for the image in the image library.
Answer Width:
Answer Height:
Description Width:
Description Height:
These options allow the user to define the height and width of the answer values whether they are images or text, and the answer descriptions under the images if you are using images and image descriptions.
This can be achieved by:
| • | Typing the exact number of pixels desired for the option being edited into each of the text boxes. This may require some trial and error. |
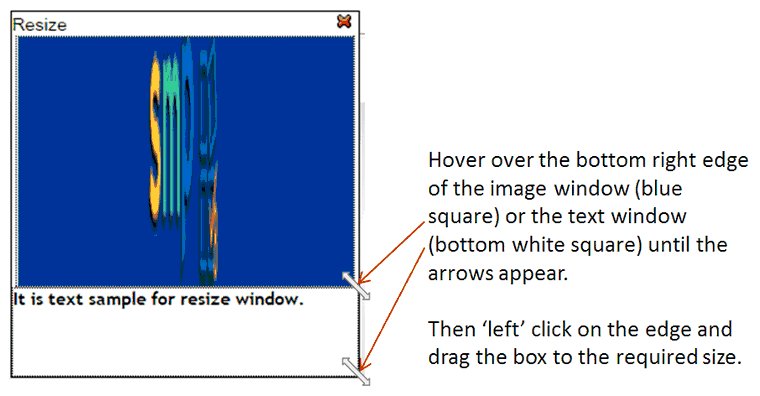
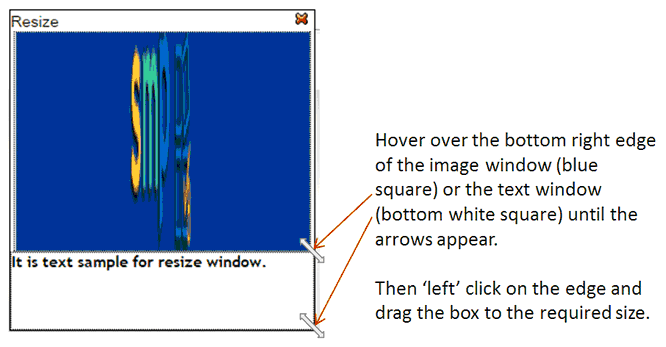
| • | Clicking on the box image, which causes the following pop up to appear. |
Once this pop up appears the size of the answer and/or description of an image can be set by dragging the pop up boxes to the desired widths and heights.
Adding Rows (Question Stimuli)
To add the rows to your grid click on one of the four types of row headings that can be added.
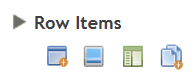
These options are the same as for column headings.
The first icon allows you to enter an un-formatted text column heading. You can cut and paste the text into these column heading boxes from MS Word without worrying about the Word formatting coming across. The default theme formatting will be applied which is suitable in most cases.
The second option opens the image library. Select the images you wish to use in the grid by clicking on and selecting the appropriate images. Note that you can upload new images to your library from this option also.
The third option allows you to create a rich text column heading. Clicking on this icon creates a placeholder - you then click on this placeholder to open the rich text editor and type in and format your column heading.
Clicking this icon will open a pop up text box that will enable you to cut and paste all your column headings from another document in one go. Each column heading must be on a separate line. Any document formatting from the original document will be deleted.
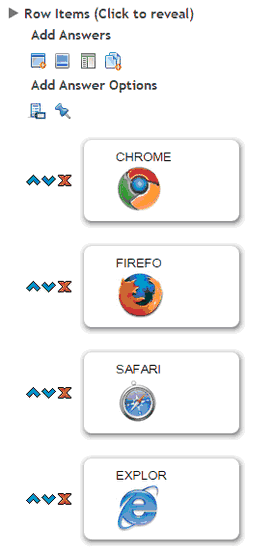
Note that the rows that were added to this question were images. This was achieved by clicking on the "Add Image" option which takes you to the image library. For more on adding images from the image library read this chapter - Selecting Images.
The other options in that you can use here include:
Answer names: Click to input the names you wish to give each question which will also appear in the data extract when you download the data.
Fix position: Click on this option to select the columns that you wish to lock in position when using the randomize option. For example you may wish to lock an answer such as Not Applicable as the last column.
Further Row parameters include - (click on the arrow to reveal).
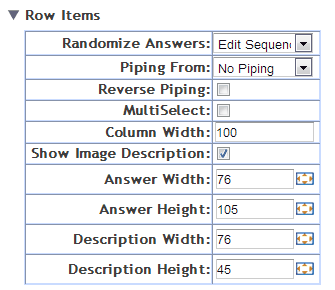
Randomize answers: There are four randomize answer options for the user to select from -
Edit Sequence: This option does not randomize but presents the answers in the order they are set to when entered.
Normal Random: Check the box to randomize the order of the answers for each respondent. Note that this option is often used with the Fix Position option to exclude options like Other and None from being included in the randomization.
Random Reverse: This option reverses the order in which the answers are presented from "first to last" to - "last to first" at random for different respondents.
For example one respondent will be shown the answers to a scale in this order -
Agree - Somewhat agree - Neither agree nor disagree - Somewhat disagree - Disagree : and another respondent will be shown the same scale but in the reverse order:
Disagree - Somewhat disagree - Neither agree nor disagree - Somewhat agree - Agree
Random Rotate: The order of the answers will rotate in order for each respondent such that the first answer will move to the end for the next respondent and then that new first answer will be moved to the end of the list for the next respondent and so on. In this way the order is preserved but presented in a different way.
Piping from: Used to populate the answer fields with the answers selected by a respondent at an earlier question.
Reverse piping: populates the answer fields with all the answers from a previous question that were NOT selected.
To use simply select from the drop-down the previous question that contains the answers you wish piped.
NOTE: To construct a more sophisticated piping regime based on several previous questions use a Pipe question type.
Multi Select: Check this box to allow multiple answers to be accepted in the row. This effectively turns the rows into multi select questions.
Column Width: Set the column width for the for first column in the grid which contains the question stimuli.
Show Image Description: Will cause the description of an image to be displayed when image answer types are used. Note that the image description needs to have been created for the image in the image library.
Resizing Images:
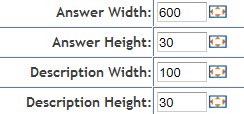
These options allow the user to define the height and width of the answer values whether they are images or text, and the answer descriptions under the images if you are using images and image descriptions.
This can be achieved by:
| • | Typing the exact number of pixels desired for the option being edited into each of the text boxes. This may require some trial and error. |
| • | Clicking on the box image, which causes the following pop up to appear. |
Once this pop up appears the size of the answer and/or description of an image can be set by dragging the pop up boxes to the desired widths and heights.