|
Password |

|

|

|
||
|
Password |
|
|

|

|
Password
|
Password |
|
|
|
||
|
Password |
|
|
|
|
There are three ways to use the "Password" control.
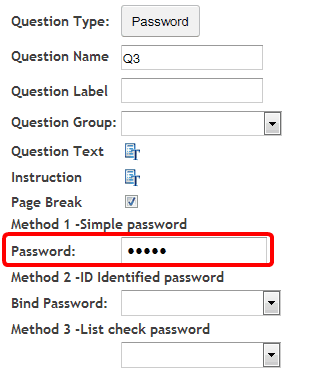
Method 1:
This is a simple method and involves the scriptor setting a single password for the entire study. This password can then be communicated to the respondent panel which they enter when doing the survey in order to continue. It is not unique - the password is the same for every respondent.
To use:
Enter a word or number that you wish to use to restrict entry to the survey to only those that know the common password in the box circled below.
The question text can be edited in the same way as any other question.
Method 2:
This method is far more secure and works much the same way as other password systems.
It works by linking or binding the survey to the respondent using fields in the panel you are using to send the survey invitations. You must decide which field in your panel will be the respondent ID and which field will be the password.
Note that he respondent ID must be unique. You can use the same field for the ID and the password but this is less secure since the ID must be included in the survey invitation being sent to the respondent.
The survey system will then retrieve the target information (in this case the password) from the panel list by matching the UID sent with the survey invitation, to the ID that has been set up as the binding field and test it against the respondents entry. A positive match allows entry and incorrect response does not.
To use this method:
First:
Load up a panel of respondents using the “Panel” system from the main menu. In this example a unique code was generated for every member of the panel (ID) and the password that will be asked for is the respondents age.
Next:
Open a survey or create a new survey and go to the survey editor.
Open up the “System Detail” pop up by clicking on the system detail icon along the top of the survey editor screen. The following pop up appears.
At the bottom of the pop up are two fields that you need to populate. Choose the panel you are planning to use to send your survey invitations to from the drop down and then select the field that will be used to match the respondent to their panel data.
Note: This is the binding field that connects the respondent to their panel information via the unique identifier. You must use this field as the UID in the invitations you send. To see how this is achieved go to the "Sending survey invitations with a UID".
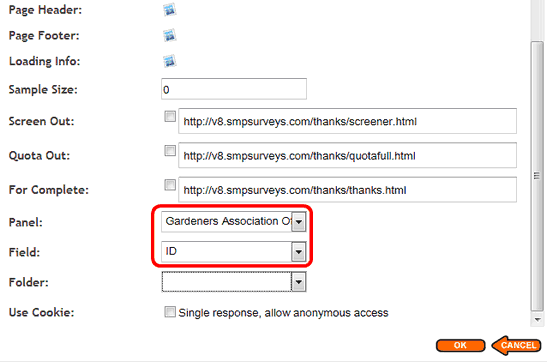
In the above example “Panel:” selected was a list called 'Gardeners Association" and the “Field:” that will be used to link the survey to the panel is the unique filed called 'ID'.
Finally:
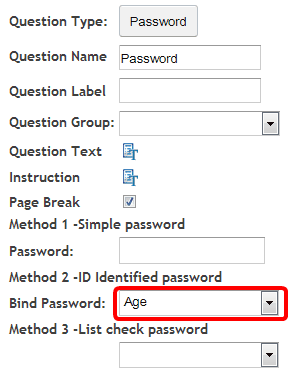
Create a new question and select the “Password: type from the pop up
In the “Bind password:” drop down select the field that will be used as the password that the respondent will be required to enter to proceed. In this case “Age”
Add the question text - anything you like – it is built in the same way as any question. The question will look like this.
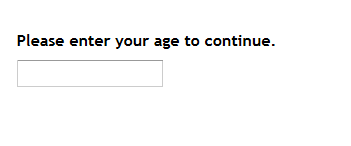
If the respondent types in the correct entry they will be allowed to continue.
Note: Because this method relies on binding with the Panel via an invitation sent using a binding UID it can only be tested by deploying the survey and sending a test invitation from a test panel to yourself.
Method 3 - List check
The third method uses a field in your nominated panel and just checks that the entry made by the respondent is a valid entry in the panel field. It does not attempt to link the respondent to the panel - it just makes sure that the entry exists in the panel.
In the example below a panel is selected in the 'Survey Detail' pop up and the field used is the 'Membership No'.
First:
Load up a panel of respondents using the “Panel” system from the main menu. This panel contains the field that will be checked against.
Next:
Open a survey or create a new survey and go to the survey editor.
Open up the “System Detail” pop up by clicking on the system detail icon along the top of the survey editor screen. The following pop up appears.
At the bottom of the pop up are two fields that you need to populate. Choose the panel you are planning to use to send your survey invitations to, from the drop down. Their is no need this time to select a binding field as it is not used for this method.
Note: The system will automatically select a binding field - just ignore it as it will not be used.
In the above example “Panel:” selected was a list called 'Gardeners Association" SMP automatically chose the first field in this panel for the 'Field' text box but it is not used.
Finally:
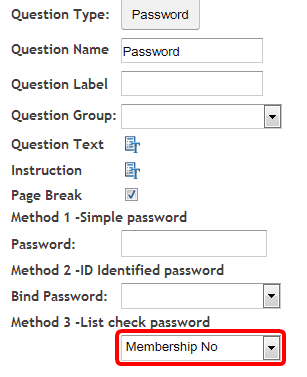
Create a new question and select the “Password: type from the pop up
In the “Method 3 - List check password” drop down select the field that will be used as the password that the respondent will be required to enter to proceed. In this case “Membership No”
Add the question text - anything you like – it is built in the same way as any question. The question will look like this.
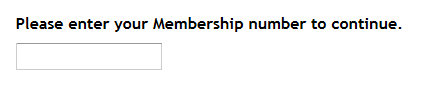
If the respondent types in a correct membership number they will be allowed to continue.
Note: The respondent only needs to type in a correct entry - it does not mean that it is their membership number. This is less secure than method two.