|
Visual Scale. |

|

|

|
||
|
Visual Scale. |
|
|

|

|
Visual Scale.
|
Visual Scale. |
|
|
|
||
|
Visual Scale. |
|
|
|
|
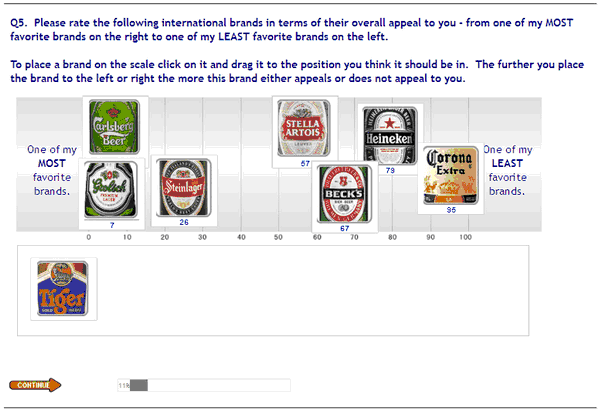
Example of a Visual Scale question using images as the stimuli. You can also use text or statements that you wish to rate on an interactive visual scale.
Question parameters for Visual Scale.
Question parameters for Single Select Text:
 : Enter the question text by clicking on the Question Text icon. A rich text editor box appears where you type your question. You have full rich text control over the question formatting.
Note the question text appears in the central panel (Question Display) when you close the rich editor box by clicking the
 in the top left corner.
 : Enter the instruction text by clicking on the Instruction icon.A rich text editor box appears where you type your instructions. You have full rich text control over the question formatting.
Note the Instruction text appears in the central panel (Question Display) when you close the rich editor box by clicking the
in the top left corner.
 : If this option is checked a page break will be inserted after this question forcing the next question to appear on a separate screen. If you desire a number of questions to appear on the same page then uncheck this option and the next question will appear under this one and so on until you check the box to force a new page.
 : Question must be answered by the respondent. Note that the default setting is ‘True’.
Creating the stimuli to place on the scale is done by creating "Answers". The image below shows the detail of the Answers section used to create the above example.
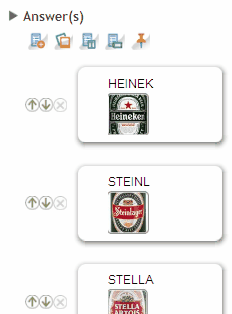
 Add Text Answer: Click to add another answer option. Note your answers appear in the central panel (Question Display) as you enter them. Answer order can be changed with the up and down arrows, or deleted with the cross which all sit beside each answer.
 Add Answer Images: Click on this icon to open the image library and choose the images you wish to include as possible answers.
 Add Answer Rich Text: Click on this icon to include a rich text answer. Click on the rich text editor icon to open the rich text editor and include any formatted type of question you like.
 Add Answer Frame: Opens a popup that enables the user to add all the answers to a question in one go. Each separate answer must be on a separate line. You can CUT and PASTE the answers into this box from another source such as MS Word.
 Answers Name: Allows the user to name each answer variable which will be used in the data extract.
 Fix Position: Lock an answer in position so that it maintains the same positional order despite answer randomization. Clicking on this option causes a selector box to appear beside each answer. Check the boxes next to each answer that you do not wish to rotate.
Other parameters that can be set.
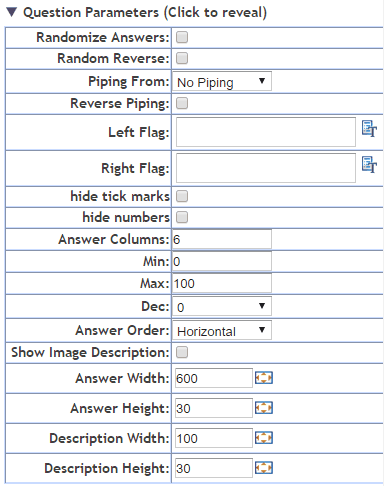
Randomize answers: Check the box to randomize the order of the answers for each respondent. Note that this option is often used with the Fix Position option to exclude options like Other and None from being included in the randomization.
Random Reverse: Check this to cause the order of a answer series to be reversed for 50% of the respondents. This is often used for rating scales were the order of presentation can have an impact on the result.
Piping From: Used to populate the answer fields with the answers selected by a respondent at an earlier question.
Reverse Piping: populates the answer fields with all the answers from a previous question that were NOT selected.
NOTE: To construct a more sophisticated piping regime based on several previous questions and/or options, use a 'PIPE' control type to create a new answer frame and select this pipes name in the 'Piping From' drop down above.
Left Flag: The left hand side of the scale. Open the rich text editor and type in and format the label description for the left hand panel of the scale.
Right Flag: The right hand side of the scale. Open the rich text editor and type in and format the label description for the left hand panel of the scale.
hide tick marks: Select to remove the tick marks from the scale.
hide numbers: Select to remove the tick mark scale numbers
Answer Columns: Arranges the answers into the designated number of columns. Useful for long lists of potential answers.
Min: Determines the minimum score rating for the scale. Type the number in the box.
Max: Determines the maximum score rating for the scale. Type the number in the box.
Dec: Determines the number of decimals for the score rating. Type the number in the box
Answer Order: Arranges the list of answers in either a horizontal fashion - across the top first then down to the next row, or, vertical, down the column first then across to a new row.
Show Image Description: Will cause the description of an image to be displayed when image answer types are used. Note that the image description needs to have been created for the image in the image library.
Answer Width:
Answer Height:
Description Width:
Description Height:
These options allow the user to define the height and width of the answer values whether they are images or text, and the answer descriptions under the images if you are using images and image descriptions.
This can be achieved by:
| • | Typing the exact number of pixels desired for the option being edited into each of the text boxes. This may require some trial and error. |
| • | Clicking on the box image,  which causes the following pop up to appear. which causes the following pop up to appear. |
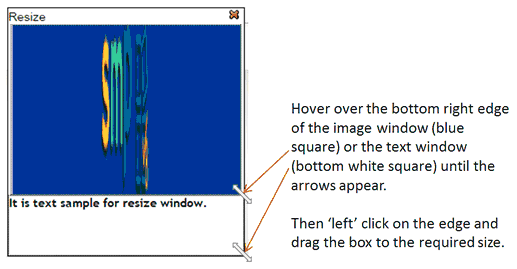
Once this pop up appears the size of the answer and/or description of an image can be set by dragging the pop up boxes to the desired widths and heights.