|
The Themes Editor |

|

|

|
||
|
The Themes Editor |
|
|

|

|
The Themes Editor
|
The Themes Editor |
|
|
|
||
|
The Themes Editor |
|
|
|
|
Introduction
Customize the look and feel of your survey using the themes editor and create an engaging experience for your respondents. The Themes editor allows you to design almost any type of web page you require. Using the themes editor you can,
| • | Add any image almost anywhere including logos, ads, pictures, anything, |
| • | Modify the layout of the interface to place your questions, instructions, answers and warning messages anywhere on the screen, |
| • | Customize the color scheme of any item, |
| • | Change font properties, |
| • | Upload your own customized navigation buttons or choose from our public set, |
| • | Place headers and footers, |
| • | Add lines and boxes. |
Some examples of the public themes include the following. You can create your own from scratch or modify a public theme by saving it to your private library.
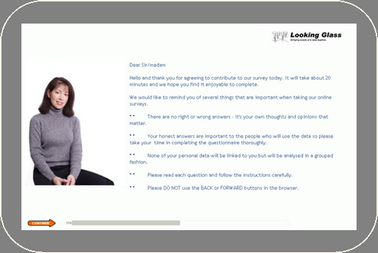
Insert an interviewer
|
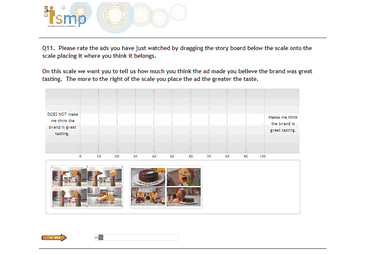
A clean fresh look
|
|
|
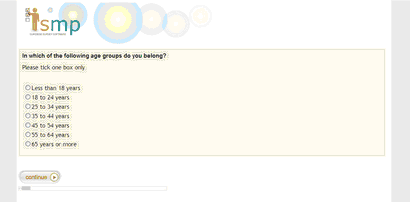
A framed option
|
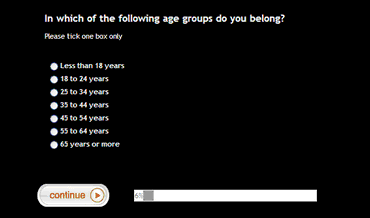
White on black
|
Edit or create a theme.
To create a new theme for your survey click on the Theme button below.
The themes editor home page (shown below) will appear on screen.
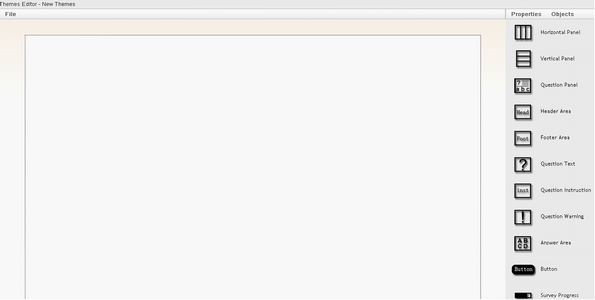
Create a new theme for your survey by clicking on ‘File’ (Top Left) & then click on ‘New Themes’. Alternatively you can use an existing theme or modify an existing theme and save it by giving it a new name. On the right of the screen you will see a number of objects that you can add to the survey theme by dragging and dropping them in the blank space on the left. We will now give you a brief overview of each object.
Creating a theme basics.
The method of creating a theme in a web environment is quite difficult and is probably the hardest element of the SMP survey system to grasp and master. Once you do understand the basic concept though it can be quite rewarding - albiet still a little frustating.
Essentially you begin with a blank screen and onto to this screen you build up a set of layers that both control the format of each element and the position of the element. the best way to describe it is to lead you thorugh and example.
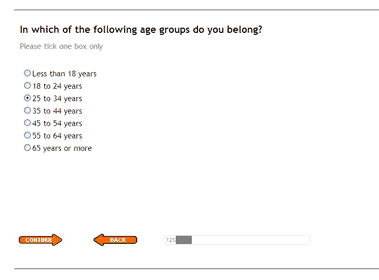
I want to build the following screen (note this is the default survey screen):
1. The first thing to note is that the main structure of the theme is arranged vertically down the screen. So the first layer we need to place is an object layer that will hold other questionnaire objects in a vertical (one under another) format. To do this click on and drag the Vertical Panel object from the right side panel onto the balnk screen pane. Note that once placed you are able to click on it which provides a set of criteria that can be set.
2. We have created a placeholder for the whole of the screen. Now we need to create a placeholder that we will use to arrange the survey elements. So again click on and drag a Vertical Panel inside the previous vertical panel.
Now our screen is set up vertically and we have a place holder in a vertical format to hold the questionnaire elements.
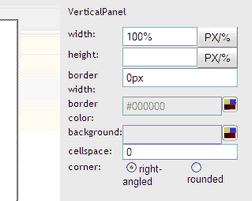
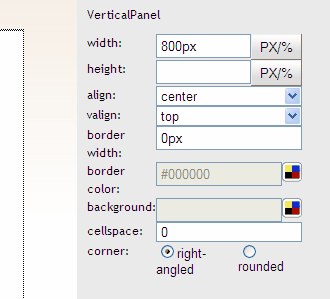
Lets format this new vertical Placeholder such that it is 800 pixels wide and is centered in the screen horizontally and aligned to the top of the screen. To do this click on this panel and adjust the parameters as in the screen shot below.
This will hold the survey in the middle of the screen at 800 pixels wide and align to the top of the screen
3. Now we need a placeholder for the questionnaire elements. For this we use a "Question Panel" object. Click on and drag a Question Panel object from the right hand pane and place it inside the internal most vertical panel object. Now we have a placeholder fro the question elements such as the question text and the answer text.
Now we want to be able to align the question elemenst such that they are 20 pixels apart vertically. To achieve this we need to drag another vertical panel into the Question Panel. See how we are building up the panels in an ordered fashion to achieve the end goal.
So then - drag another vertical panel into the Question Panel.
You should now have a screen that looks like this.
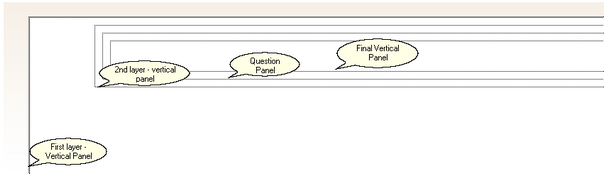
Now we place the question elements inside the Final Vertical Panel which is inside the Question Panel which is required in order to hold the question elements.
4. Drag and drop the question elemenst into this final panel and format.
Click on and drag the Question Text, Intruction Text, Answer Text and Warning text objects into the top layer Vertical Panel. Your screen should now look like this.
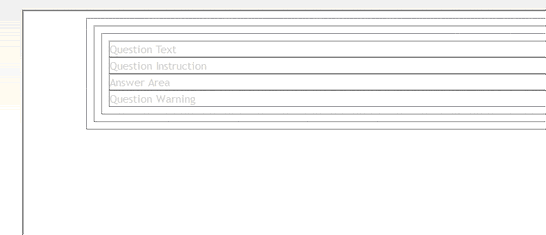
Note how all the elements of a question are pressed up against one another. For this theme we do not want this so we set the cellspace parameter in the Panel that holds these elements (the Vertical Panel) to 20 (pixels). This will cause a 20 pixel space between each element of the Vertical Panel, in this case the question elements, Question Text, instruction text, Answer Text and Warning Text.
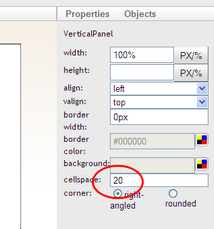
This will cause a spacing like in the following screen,.
Theme Objects
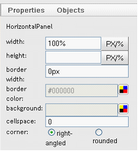
Horizontal Panel
By inserting a horizontal panel you can place two or more objects (e.g. next & back buttons) next to each other. Shown below is the properties tab for the horizontal panel. You can use this tab to define the height, width, border width, border colour, background colour & shape of the edges of the horizontal panel.
Vertical Panel
By inserting a vertical panel you can place two or more objects (e.g. Question Text, Question warning & Answer area) one below the other. Shown below is the properties tab for the vertical panel. You can use this tab to define the height, width, border width, border colour, background colour & shape of the edges of the horizontal panel.

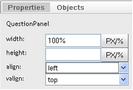
Question Panel
The question panel helps define the orientation of the question section within the layout of the survey. You can use it define the width, height & alignment of the question section.
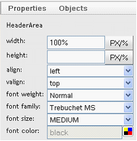
Header Area
The Header area helps define the orientation of the header space within the survey & the properties of the font used as part of the header. The actual image and or rich text used in the header is sourced from the survey details window.
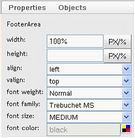
Footer Area
The Footer area helps define the orientation of the footer space within the survey & the properties of the font used as part of the footer. The actual image and or rich text used in the footer is sourced from the survey details window.
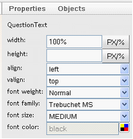
Question Text
The Question Text object should be dragged and dropped inside the Question Area object. It helps define the width, height, alignment & font of the question text.
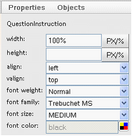
Question Instruction
The Question Instruction object should be dragged and dropped inside the Question Area object below the Question Text object. It helps define the width, height, alignment & font of the question instructions.
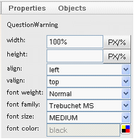
Question Warning
The Question Warning object should be dragged and dropped inside the Question Area object below the Question Text & Question Information object. It helps define the width, height, alignment & font of the question warning that pops up when respondents either fail to provide a response or enter an inappropriate response.
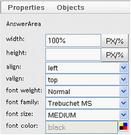
Answer Area
The Answer Area object should be dragged and dropped inside the Question Area object below the Question Text, Question Information object & Question Warning object. It helps define the width, height, alignment & font of the Answer Area.
Buttons
The Buttons object is used to import / customise navigation buttons used in a survey. A programmer can import customised images for ‘Next’, ‘Back’, ‘Submit’ & ‘Save & Exit’ buttons.
To modify the properties of a button, click on its image. The following properties tab appears on the left.
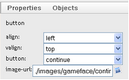
You can now use this properties tab to change the alignment, function and/or image of the object.
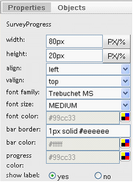
Survey Progress Bar
The survey progress bar helps us in managing the respondents expectations by keeping him/her informed about the progress he/she has made in answering the survey. You can modify the height, width, alignment, font, colour and outline properties of the bar by using the properties tab shown below.
Rich Text
The rich text object allows us to insert any image or rich text in the layout of the survey using the properties box shown below.